Set up Tuvora on Android
Phone or tablet, from install to your first playlist. The app opens on a sign-in screen and then a profile screen, so there are two gates before you ever see Home — both are covered below.
1. Install
- Tuvora is on Google Play open testing. Join the tester group with your Google account first.
- Open the phone and tablet listing and install as normal.
- Not using Play? Download the APK from tuvora.co/apk and allow your browser to install unknown apps when Android asks.
2. First launch — sign in, or carry on without an account
The first thing you see is the account gate, not Home. An account syncs your playlists, profiles and watch progress between devices; skipping it keeps everything on this phone.
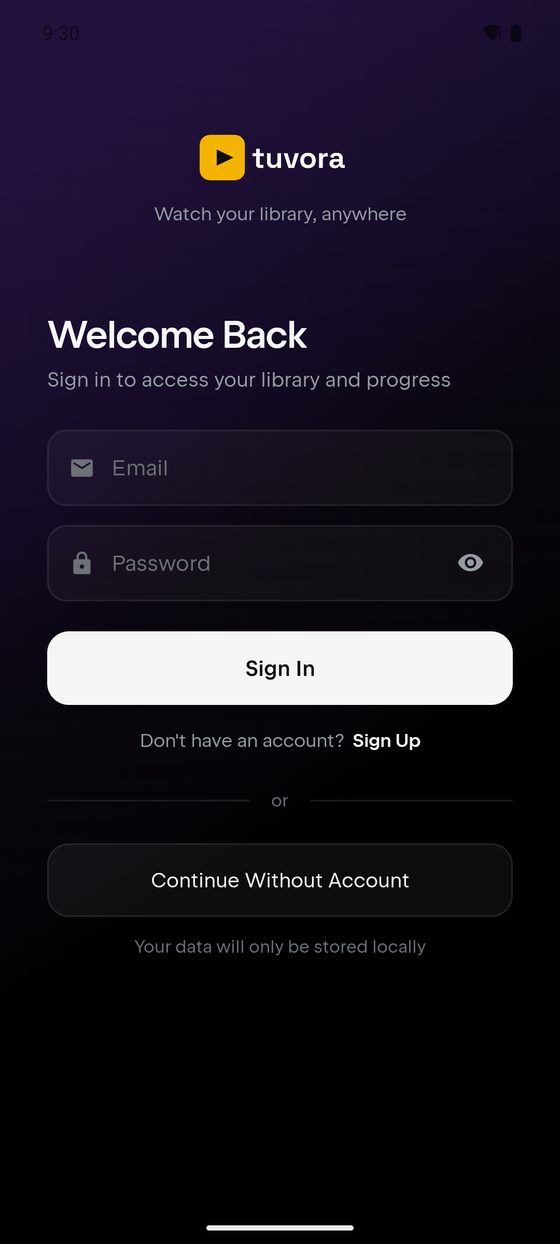
- Type your address into Email.
- Type your password into Password. The eye icon on the right reveals it.
- 1Tap Sign In.
- No account yet? Tap Sign Up, next to Don't have an account?
- To use Tuvora without an account, tap Continue Without Account. The line underneath reads Your data will only be stored locally.
The header reads Welcome Back even on a brand new install. There is no separate “go to Settings and sign in” step on Android — signing in is the first screen.
3. Create a profile
A second gate follows the account step. A fresh install has no profiles, so you have to make one before the app opens.
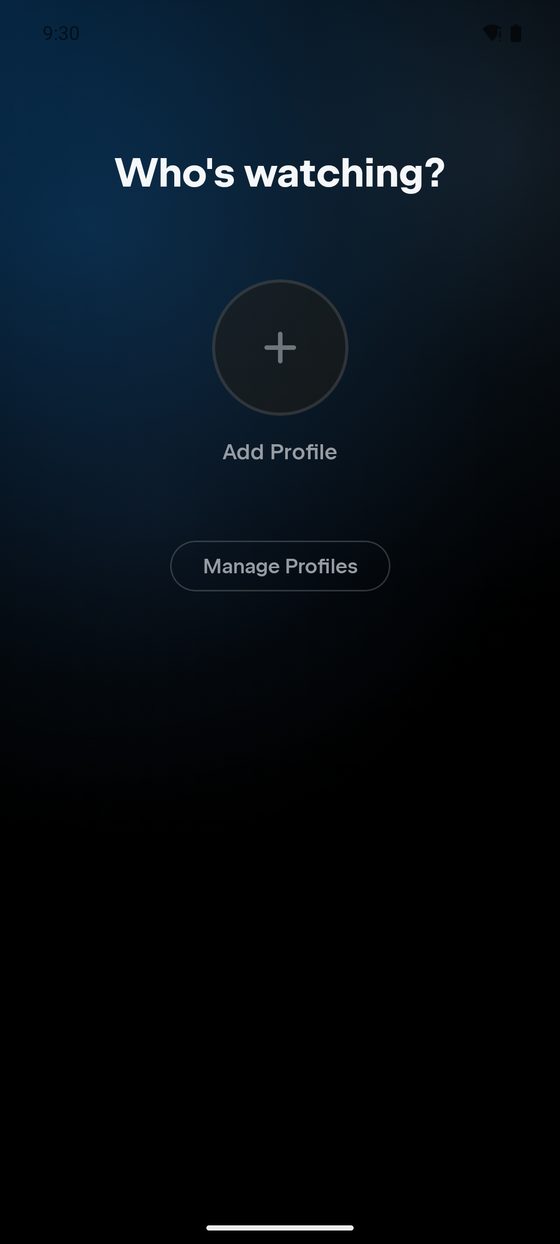
- The screen is titled Who's watching?
- 1Tap the + circle labelled Add Profile.
- Manage Profiles renames and deletes profiles later. There is nothing to manage yet.
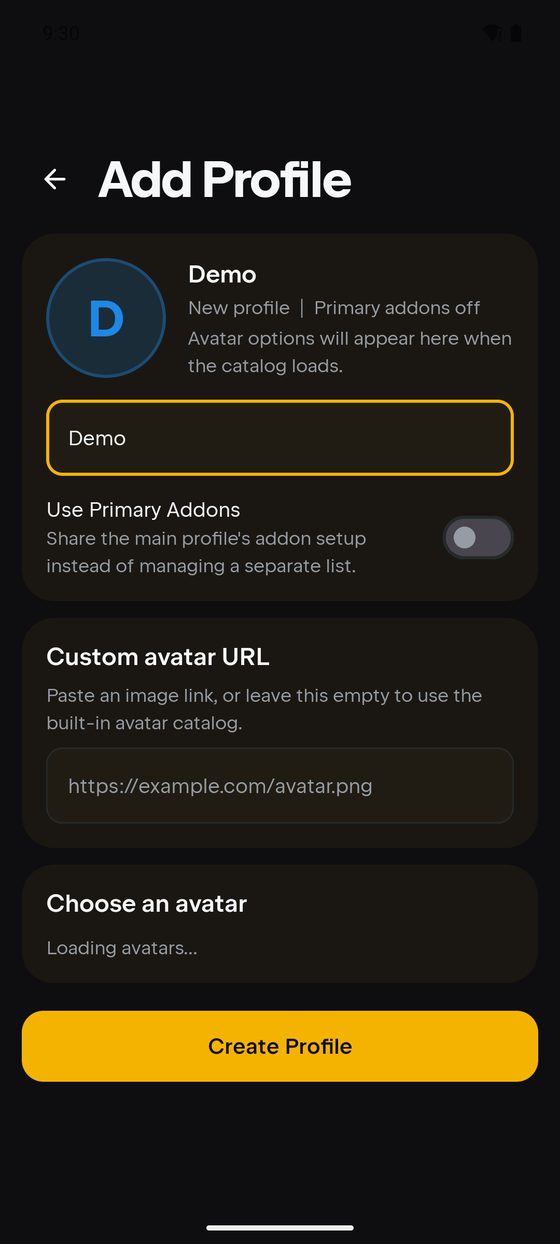
- 1Tap the name field, labelled Profile name when empty, and type a name.
- Use Primary Addons is optional — Share the main profile's addon setup instead of managing a separate list.
- Upload a photo picks a picture from your device. It is resized and stored on your account, so it shows up on every device you sign in to. Uploading needs an account.
- Custom avatar URL is optional — Paste an image link, or leave this empty to use the built-in avatar catalog. This needs a direct image link; Discord and Google Drive share links usually don't work.
- Under Choose an avatar the catalogue loads in the background; until it arrives you see Loading avatars...
- 2Tap Create Profile to finish.
4. The six tabs
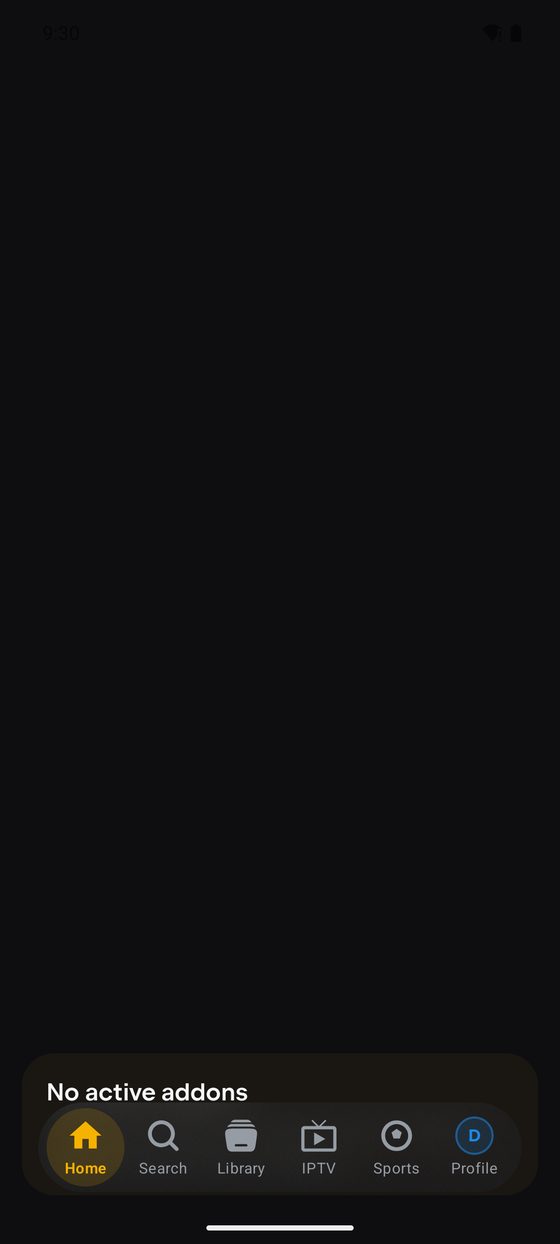
- Home — selected here. On a fresh install it reads No active addons.
- Search
- Library
- 1IPTV — where you add and browse a provider.
- Sports
- Profile — your avatar. Settings live behind it.
- Home is blank until something feeds it. The empty state says Install and validate at least one addon before loading catalog rows on Home. Your IPTV content lives on the IPTV tab either way.
- First launch also puts an Update available banner at the top and a sports promo above the tab bar. Both can be closed.
5. Add a playlist
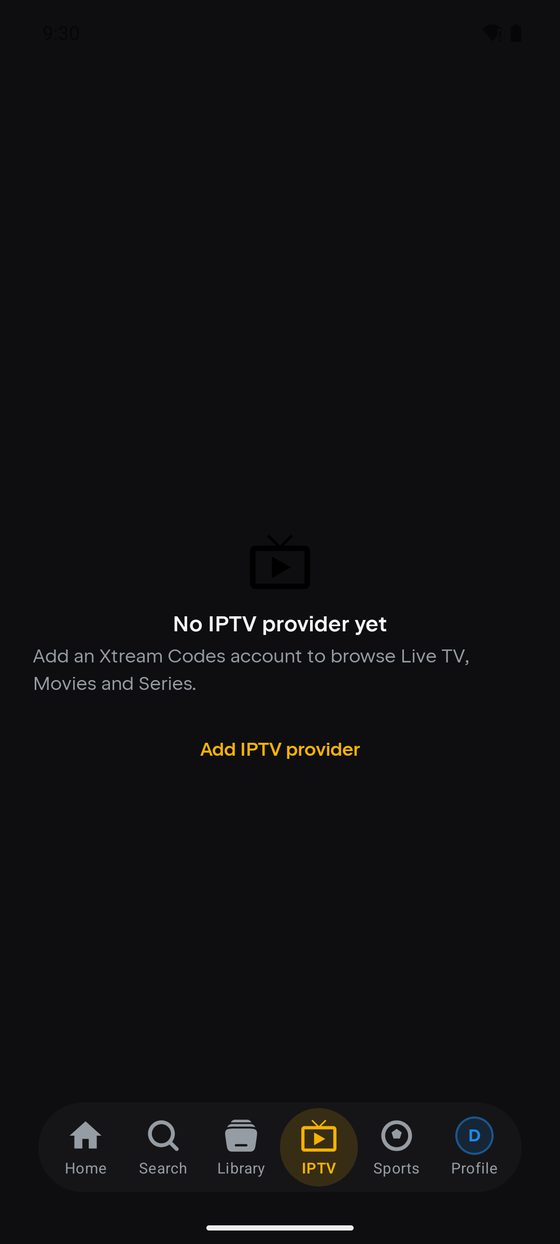
- Tap IPTV in the bottom tab bar.
- The empty state reads No IPTV provider yet / Add an Xtream Codes account to browse Live TV, Movies and Series.
- 1Tap Add IPTV provider.
Add IPTV provider does not open the form. It opens an IPTV (Xtream Codes) hub screen first, and you then have to tap Add Playlist. Two taps, not one.
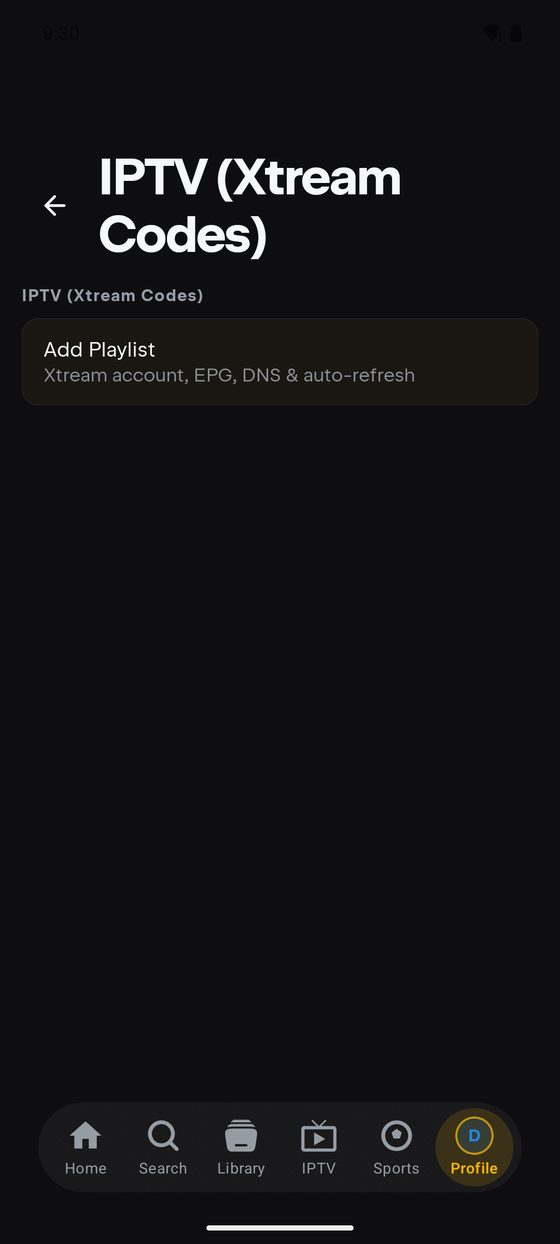
- The screen is titled IPTV (Xtream Codes), with a section header of the same name.
- 1Tap the Add Playlist row — subtitle Xtream account, EPG, DNS & auto-refresh.
- The same screen is reachable from Profile → Integrations → IPTV (Xtream Codes).
The form opens on Xtream, not URL — the chips read URL · File · Xtream · Stalker, but Xtream is pre-selected. Pick the one that matches what your provider gave you.
Switching Source Type keeps whatever you already typed in the URL box. Change the type before you type anything, or clear the field afterwards — otherwise an Xtream server address can end up sitting in Portal URL and the portal will not answer.
5a. Source Type — URL (an M3U link)
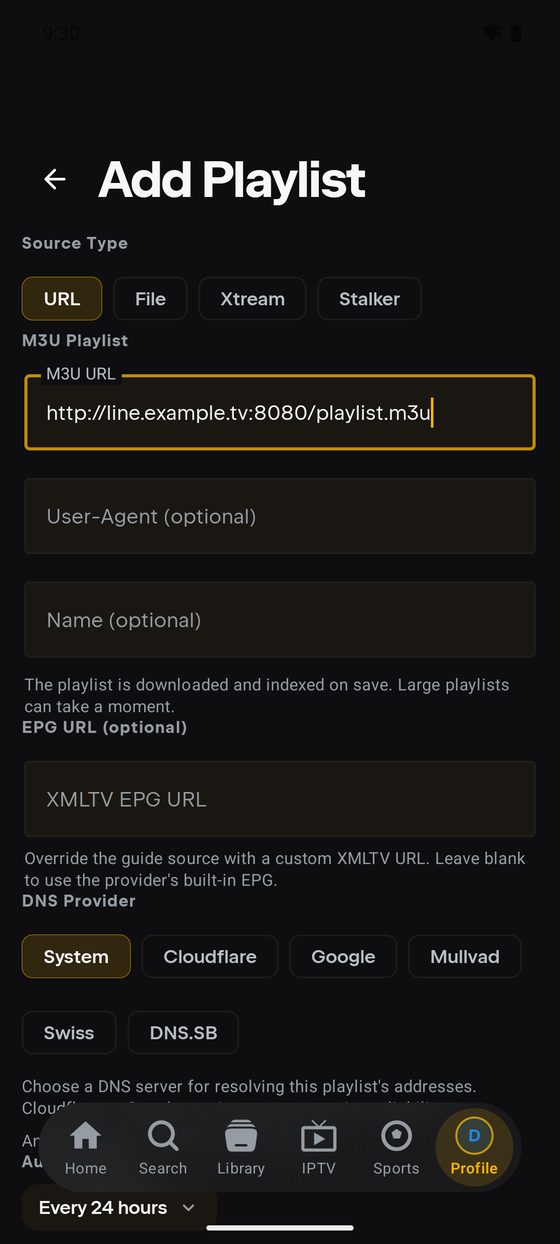
- 1Under Source Type, tap the URL chip.
- 2The section header becomes M3U Playlist. Paste your link into M3U URL — the placeholder shows
http://host:port/get.php?username=…&type=m3u_plus. - User-Agent (optional) — only if your provider requires one, e.g. VLC/3.0.20 LibVLC/3.0.20.
- Name (optional) — the label this playlist gets in the app.
- Note the hint: The playlist is downloaded and indexed on save. Large playlists can take a moment.
- EPG URL (optional) → XMLTV EPG URL. Leave it blank to use the provider's own guide.
- DNS Provider — System, Cloudflare, Google, Mullvad, Swiss or DNS.SB. It defaults to System.
5b. Source Type — Xtream Codes
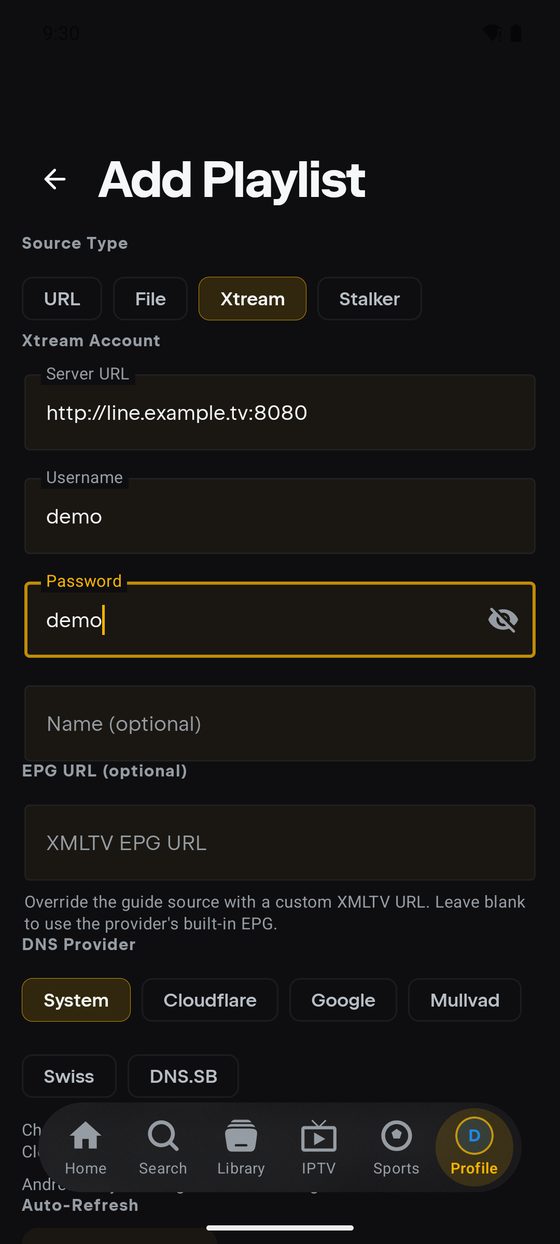
- 1Tap the Xtream chip under Source Type (it is already selected when the form opens).
- 2The section header becomes Xtream Account. Put your portal address in Server URL — the placeholder reads portal, e.g. http://host:port.
- Enter your Username.
- Enter your Password. The eye toggle on the right is labelled Show value / Hide value.
- Name (optional) labels the playlist.
- EPG URL (optional) → XMLTV EPG URL, optional.
- DNS Provider defaults to System.
5c. Source Type — Stalker portal
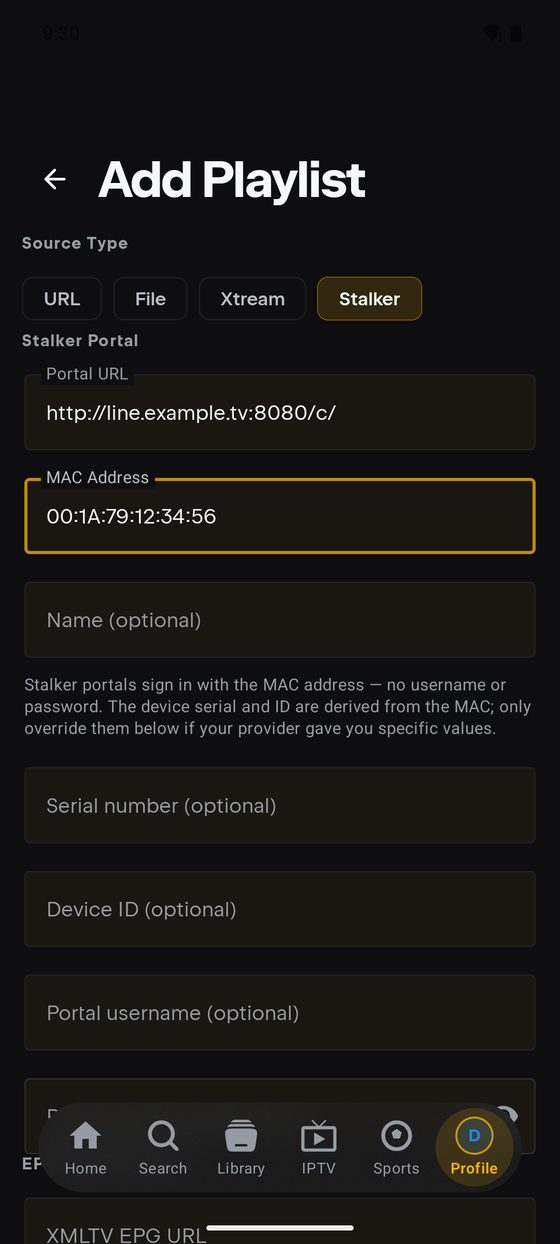
- 1Tap the Stalker chip under Source Type.
- The section header becomes Stalker Portal. Put the portal address in Portal URL — the placeholder is
http://host:port/c/. - 2Enter the MAC Address. The field already contains the prefix
00:1A:79:, so type only the last three octets. - Name (optional) labels the playlist.
- Read the note: Stalker portals sign in with the MAC address — no username or password. The device serial and ID are derived from the MAC; only override them below if your provider gave you specific values.
- Serial number (optional) — only if your provider gave you one.
- Device ID (optional) — likewise.
- Portal username (optional) and Portal password (optional) are rarely needed.
Typing a whole MAC over the pre-filled prefix gives you 00:1A:79:00:1A:79:… and the portal will reject it. Tap into the field, leave the prefix alone, and add the last three pairs only.
6. Save it
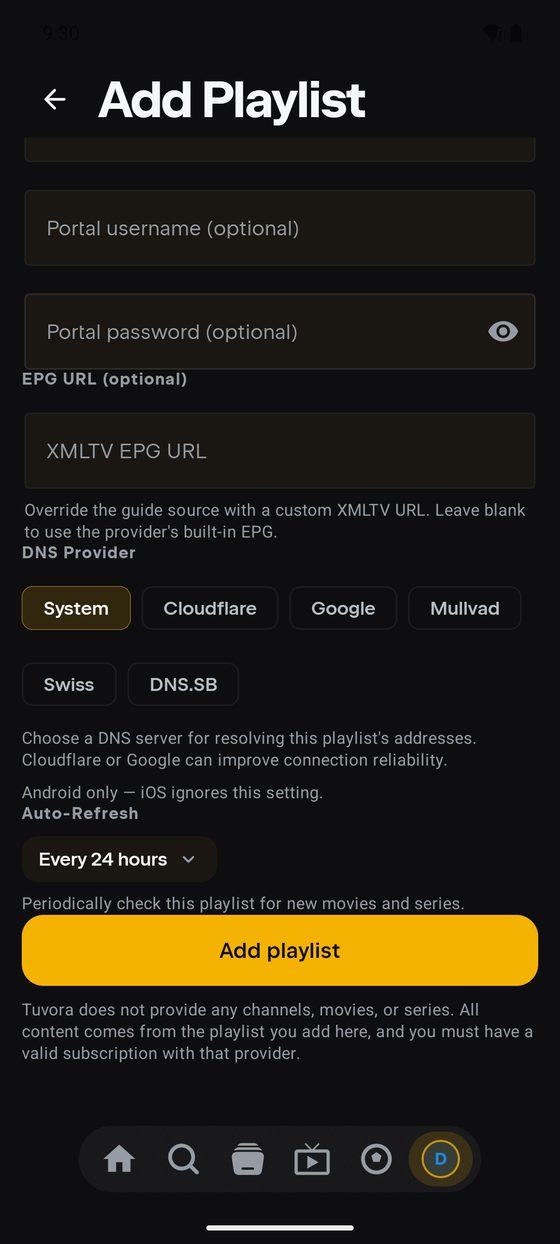
- Scroll to the bottom. DNS Provider — Choose a DNS server for resolving this playlist's addresses. Cloudflare or Google can improve connection reliability.
- Auto-Refresh defaults to Every 24 hours — Periodically check this playlist for new movies and series.
- 1Tap the yellow Add playlist button to save.
- Below it: Tuvora does not provide any channels, movies, or series. All content comes from the playlist you add here, and you must have a valid subscription with that provider.
- The screen is titled Add Playlist but the button reads Add playlist, and it is below the fold — scroll past DNS Provider and Auto-Refresh to reach it.
- The button stays greyed out until the required fields are filled: URL needs an M3U URL, Xtream needs server, username and password, Stalker needs a portal URL and a MAC address.
- DNS Provider is Android only — the form itself says Android only — iOS ignores this setting.
7. Where everything lives afterwards
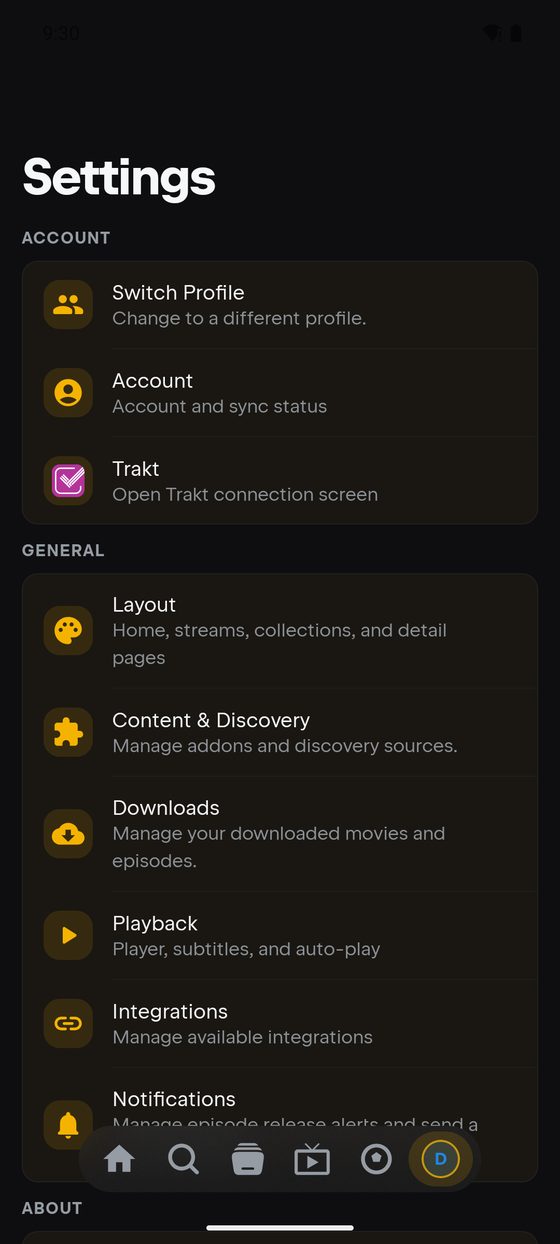
- Tap Profile in the bottom tab bar to open Settings.
- Under ACCOUNT: Switch Profile — Change to a different profile.
- Account — Account and sync status.
- Trakt — Open Trakt connection screen.
- 1Under GENERAL: Integrations — Manage available integrations — is the other way back to your playlist settings.
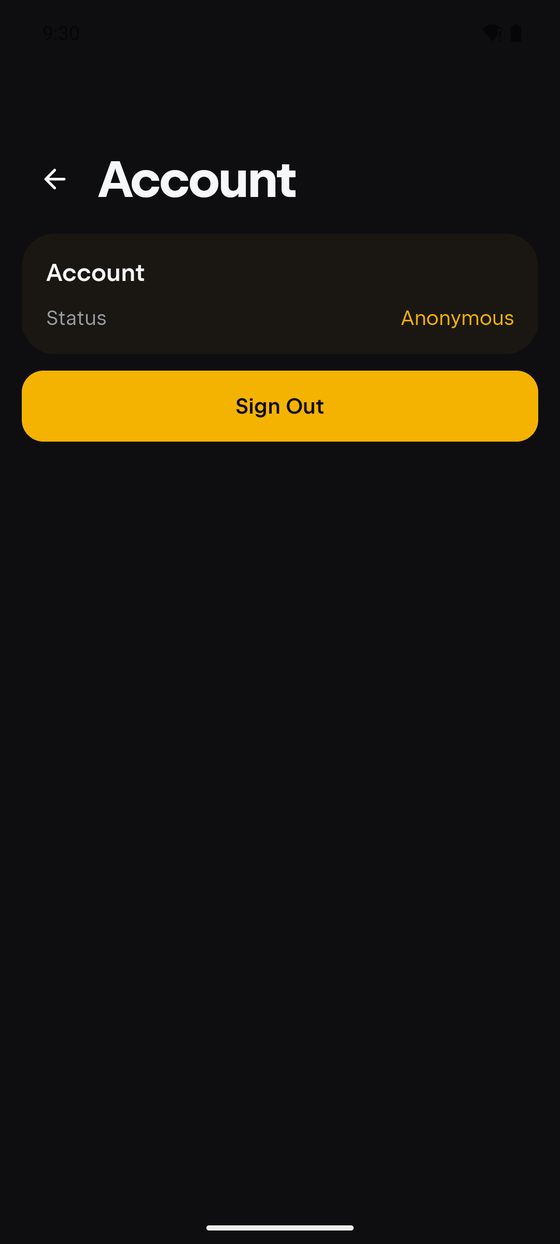
- The screen and the card are both headed Account.
- Status reads Anonymous. With a real account it reads Signed in, and Not signed in once you are fully out.
- 1Tap Sign Out to get back to the sign-in screen.
- A dialog asks Sign Out? / You will be returned to the login screen. — choose Cancel or Sign Out.
- Confirming returns you to the Welcome Back screen, where you can sign in or sign up.
If you chose Continue Without Account you are signed in anonymously, so this screen offers Sign Out and never Sign In. To attach a real account, sign out here and use the Welcome Back screen that follows.
Playlist type-specific detail lives in the M3U, Xtream Codes and Stalker guides, including troubleshooting.
Your playlist URL usually carries your username and password. Never post it publicly — blur it or replace it with http://REDACTED:8080/… in screenshots and bug reports.
Screenshots taken on Tuvora v1.4.10, Android 16, fresh install with no provider added.