Set up Tuvora on iPhone and iPad
From TestFlight install to your first playlist. Two things catch people out on iOS: the app opens on a sign-in screen and then a profile screen, and Settings is the avatar in the top-right corner rather than a tab.
1. Install
- Tuvora ships through TestFlight on iOS. Install Apple's TestFlight app first if you do not have it.
- Open the Tuvora beta invite on the iPhone or iPad itself, tap Accept, then Install. Opening it on a desktop only shows the page — TestFlight has to be on the device you are installing to.
2. First launch — sign in, or carry on without an account
The app opens on the account gate. An account syncs playlists, profiles and watch progress between devices; skipping it keeps everything on this iPhone.
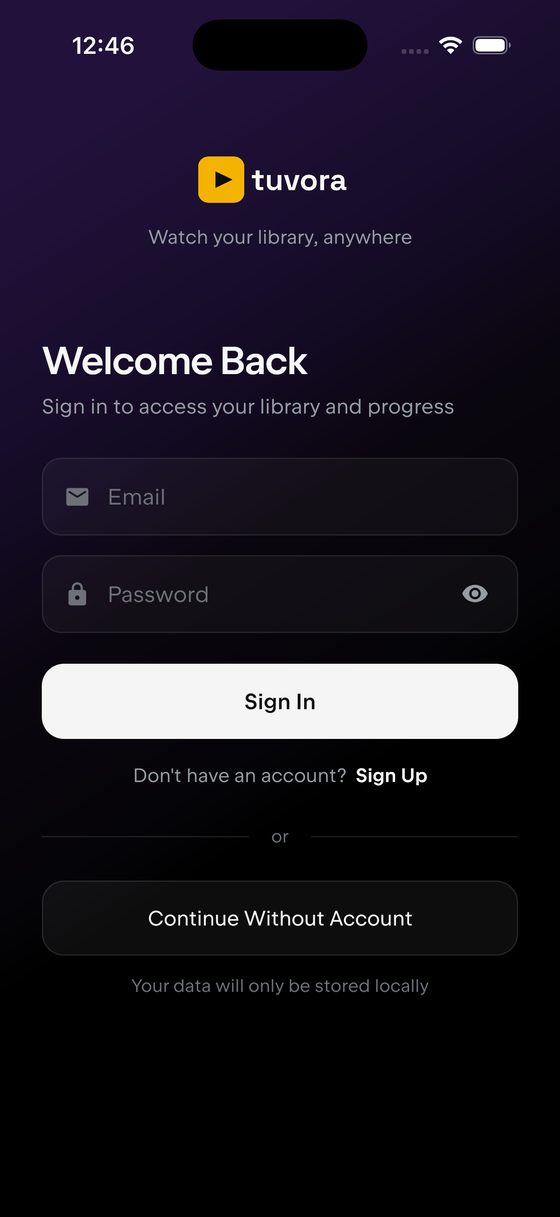
- The header reads Welcome Back / Sign in to access your library and progress.
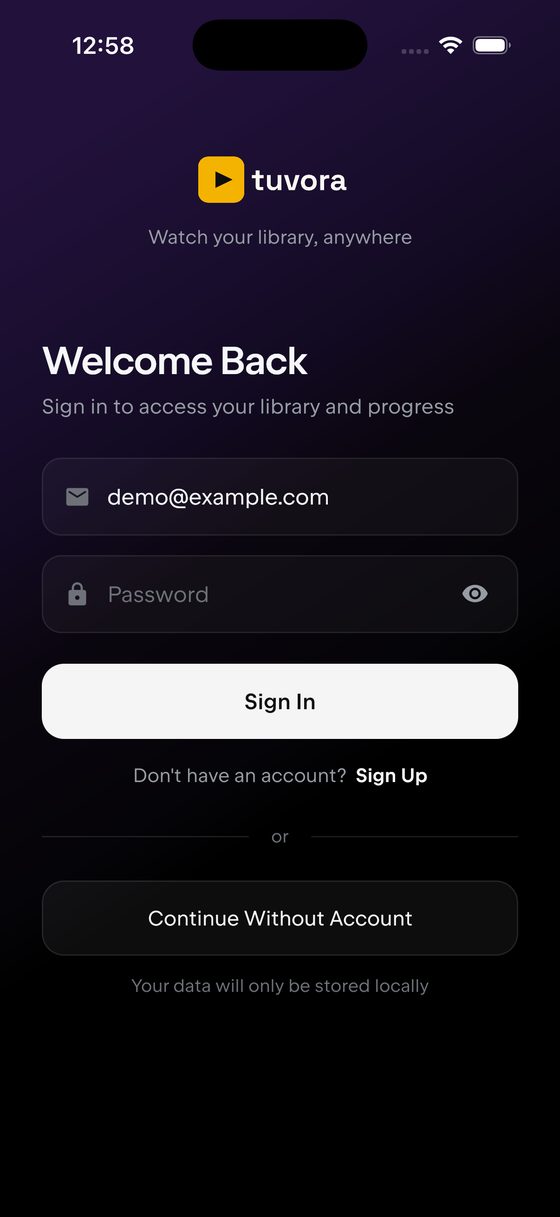
- Type your address into Email.
- Type your Password. The eye icon on the right toggles visibility.
- 1Tap the white Sign In pill.
- No account? Tap Sign Up, next to Don't have an account?
- To skip accounts entirely, tap Continue Without Account. The footnote reads Your data will only be stored locally.
3. Create a profile
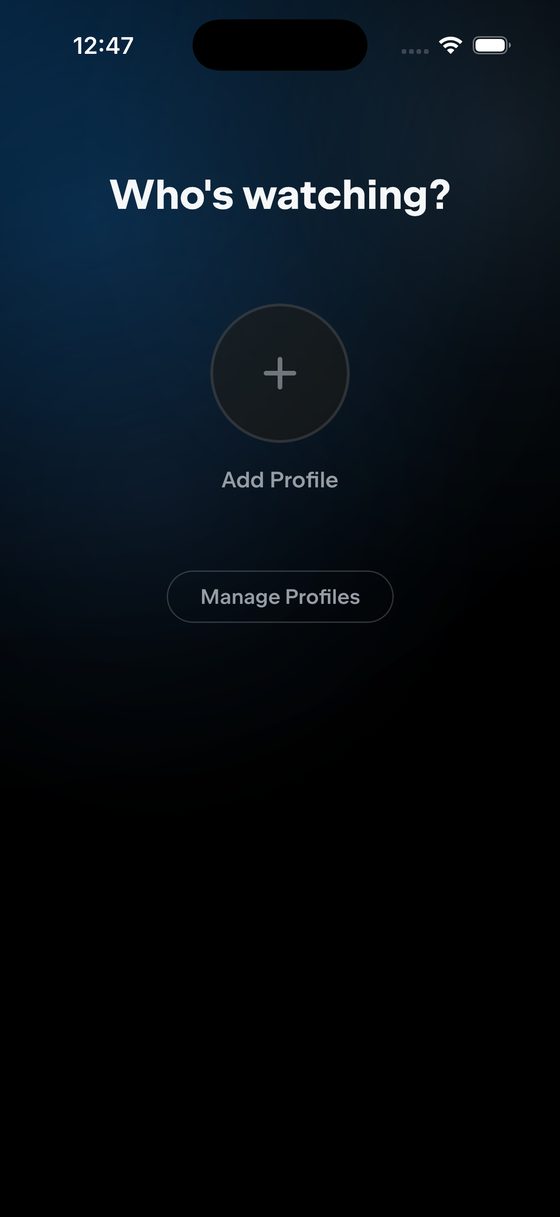
- 1On Who's watching?, tap the + circle labelled Add Profile.
- Manage Profiles, the outlined pill, is where you rename or delete profiles later.
- On the Add Profile page, type a Profile name, leave Use Primary Addons off, and tap Create Profile — the yellow button only wakes up once a name is typed.
4. Five tabs, and Settings in the corner
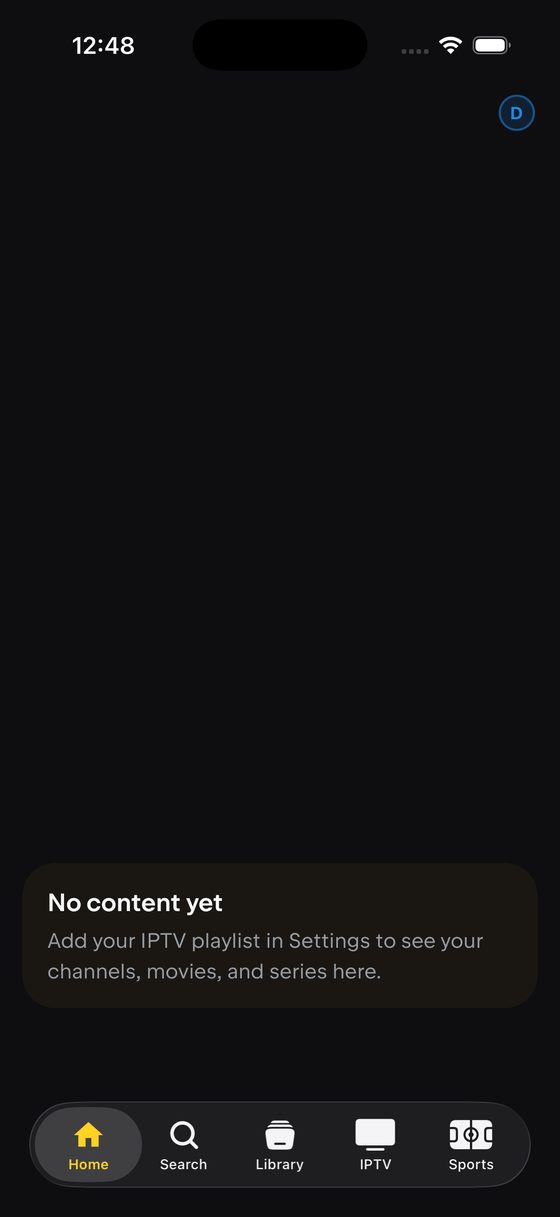
- Home
- Search
- Library
- 1IPTV — where your provider is added and browsed.
- Sports
- 2Settings is not a tab on iPhone. It is the round profile-initial avatar in the top-right corner.
- The empty state card reads No content yet — Add your IPTV playlist in Settings to see your channels, movies, and series here.
That empty-state wording is wrong in this build. Settings has no IPTV row on iOS — playlists are added from the IPTV tab. The working path is IPTV → Add IPTV provider → Add Playlist.
5. Add a playlist
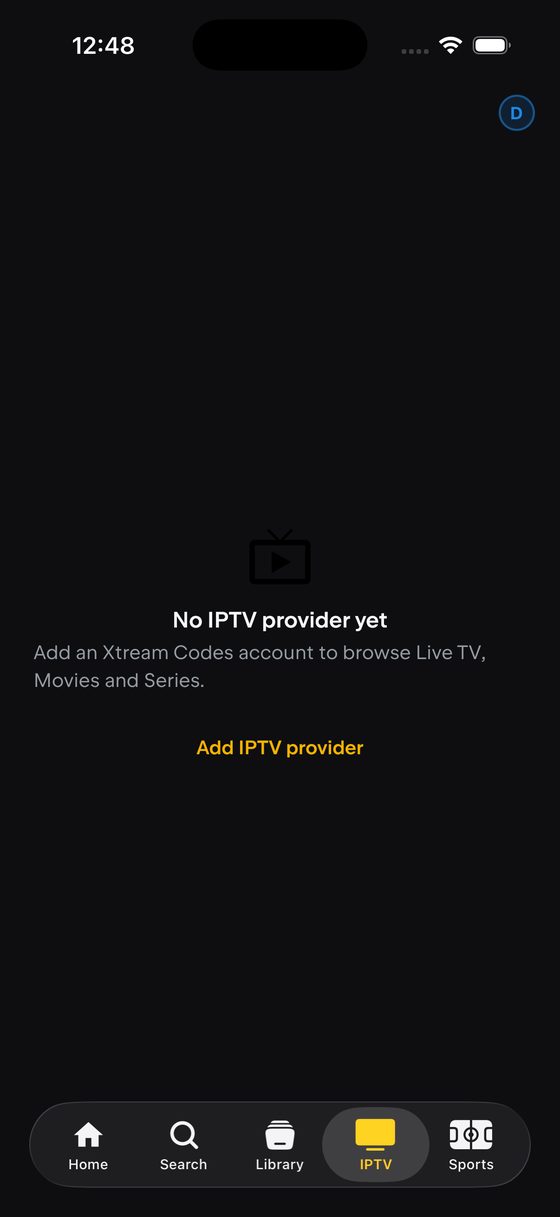
- Tap the IPTV tab.
- The empty state reads No IPTV provider yet / Add an Xtream Codes account to browse Live TV, Movies and Series.
- 1Tap the yellow Add IPTV provider link.
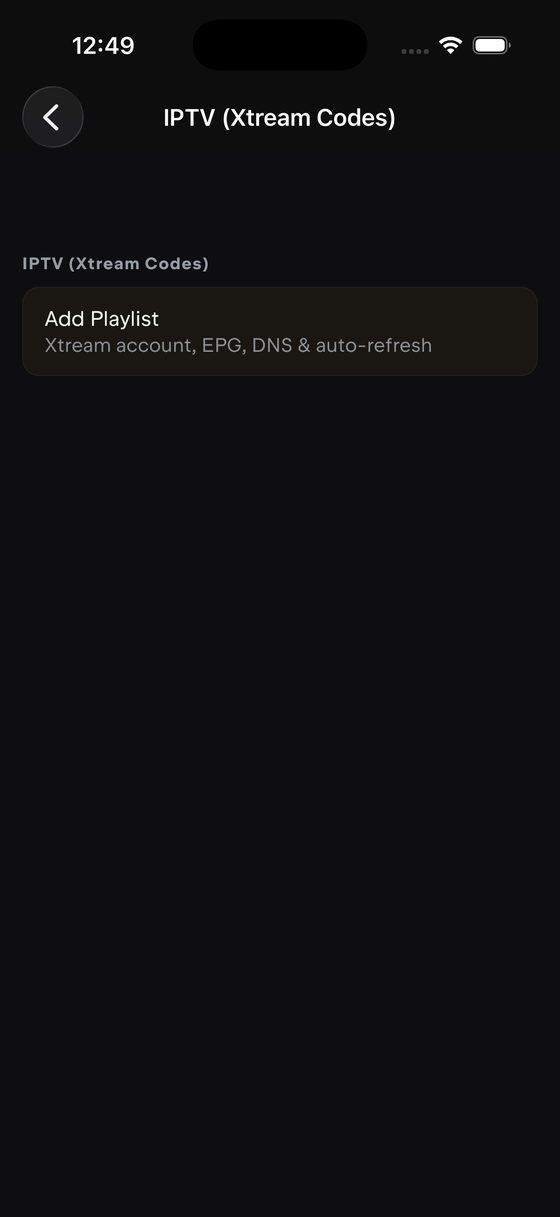
- The page is titled IPTV (Xtream Codes), and the section header repeats it.
- 1Tap Add Playlist — subtitle Xtream account, EPG, DNS & auto-refresh.
- The circled ‹ at the top-left goes back.
The form opens on Xtream. The chips read URL · File · Xtream · Stalker — a hosted M3U link is URL, not “M3U”.
Switching Source Type keeps whatever you already typed in the URL box. Typing a Stalker portal after an Xtream server produced tp://line.example.tv:8http://portal.example.tv/c/ in testing. Clear the field when you change type, or back out and open Add Playlist again.
5a. Source Type — URL (an M3U link)
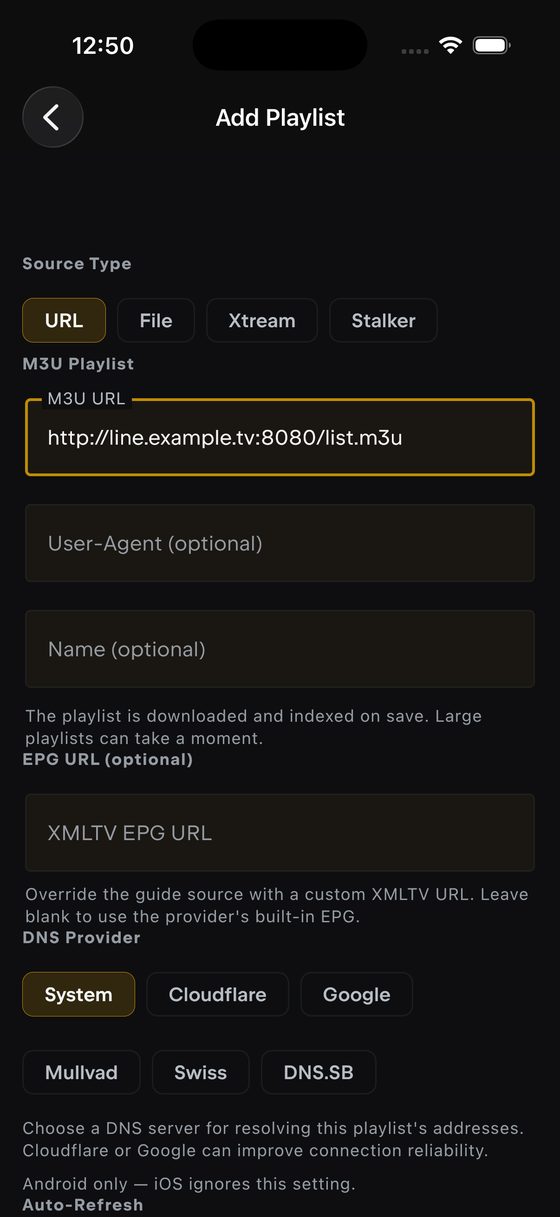
- 1Under Source Type, tap URL. The four chips are URL, File, Xtream and Stalker.
- 2The section header becomes M3U Playlist. Paste your link into M3U URL.
- User-Agent (optional) — only if your provider requires one.
- Name (optional) — the label this playlist gets in the app.
- Helper text: The playlist is downloaded and indexed on save. Large playlists can take a moment.
- EPG URL (optional) → XMLTV EPG URL — Override the guide source with a custom XMLTV URL. Leave blank to use the provider's built-in EPG.
- Skip the DNS Provider chips. The caption underneath says Android only — iOS ignores this setting.
5b. Source Type — Xtream Codes
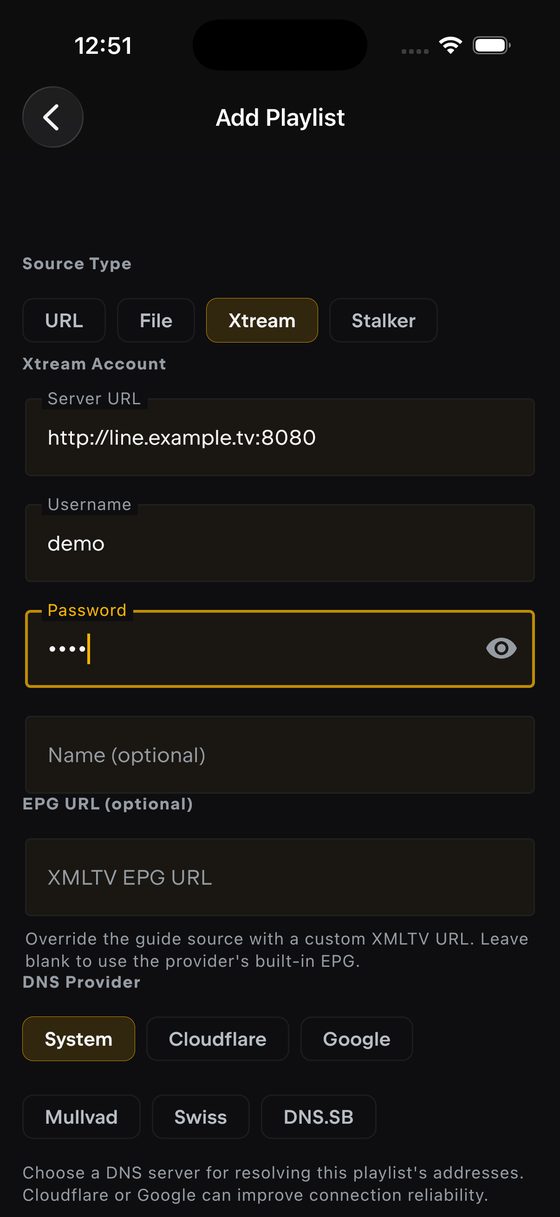
- 1Tap the Xtream chip (it is already selected when the form opens).
- 2Under Xtream Account, put the host in Server URL — scheme and port only, no
/player_api.php, e.g.http://line.example.tv:8080. - Enter your Username.
- Enter your Password. It is masked; the eye icon reveals it.
- Name (optional) labels the playlist in the app.
- Leave XMLTV EPG URL blank to use the provider's own guide.
5c. Source Type — Stalker portal
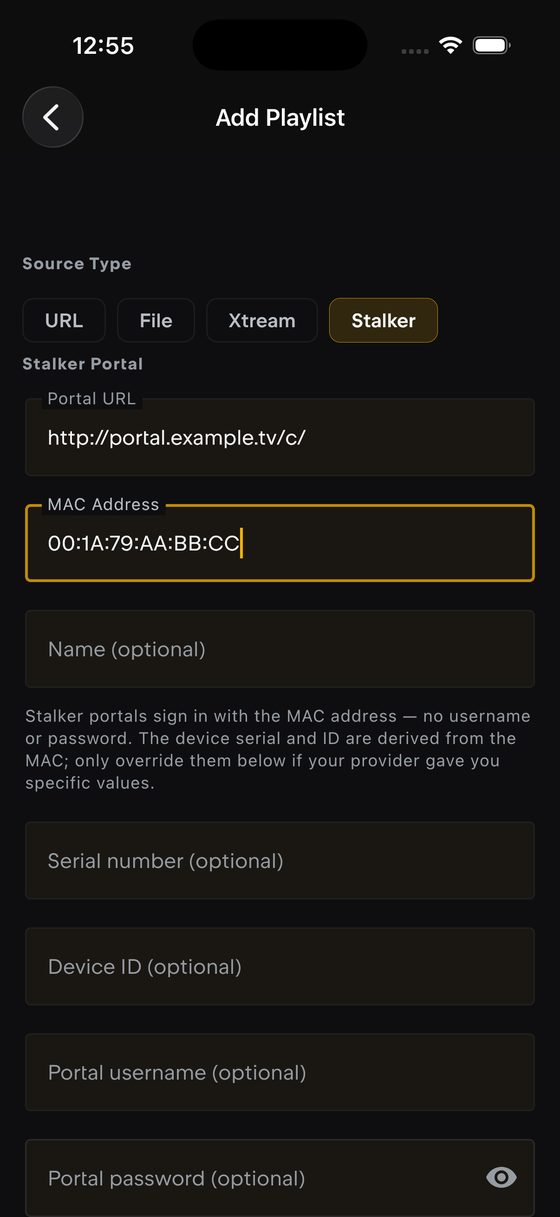
- 1Tap the Stalker chip.
- Under Stalker Portal, put the portal address in Portal URL, e.g.
http://portal.example.tv/c/. - 2MAC Address is pre-filled with
00:1A:79:. Type only the remaining three octets, so it ends up reading e.g.00:1A:79:AA:BB:CC. - Name (optional).
- The note explains: Stalker portals sign in with the MAC address — no username or password. The device serial and ID are derived from the MAC; only override them below if your provider gave you specific values.
- Leave Serial number (optional) empty unless your provider supplied one.
- Device ID (optional) — likewise.
- Portal username (optional) and Portal password (optional) are rarely needed.
- Scroll down and tap Add playlist.
Typing a whole MAC over the pre-filled prefix gives you 00:1A:79:00:1A:79:AA:BB:CC, which no portal will accept. Leave the prefix alone and add the last three pairs only.
6. Save it
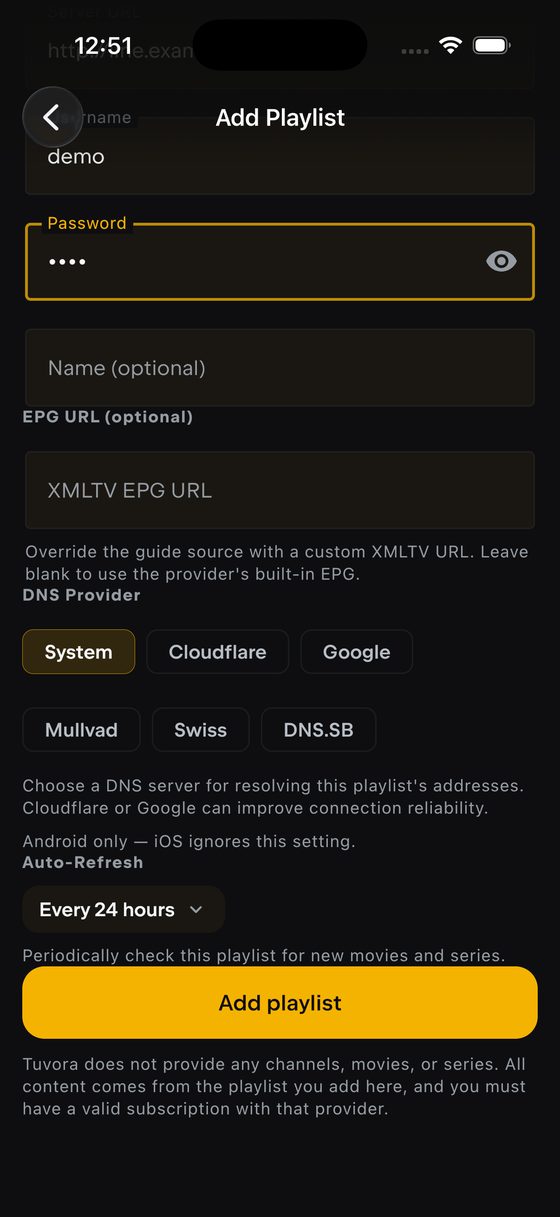
- Auto-Refresh defaults to Every 24 hours (also Off, 6, 12, 48 and 72 hours) — Periodically check this playlist for new movies and series.
- 1Tap the yellow Add playlist to validate and save. While it works the button reads Verifying… with a Contacting the provider… note; editing an existing playlist later, it reads Save changes.
- The footnote: Tuvora does not provide any channels, movies, or series. All content comes from the playlist you add here, and you must have a valid subscription with that provider.
7. Where everything lives afterwards
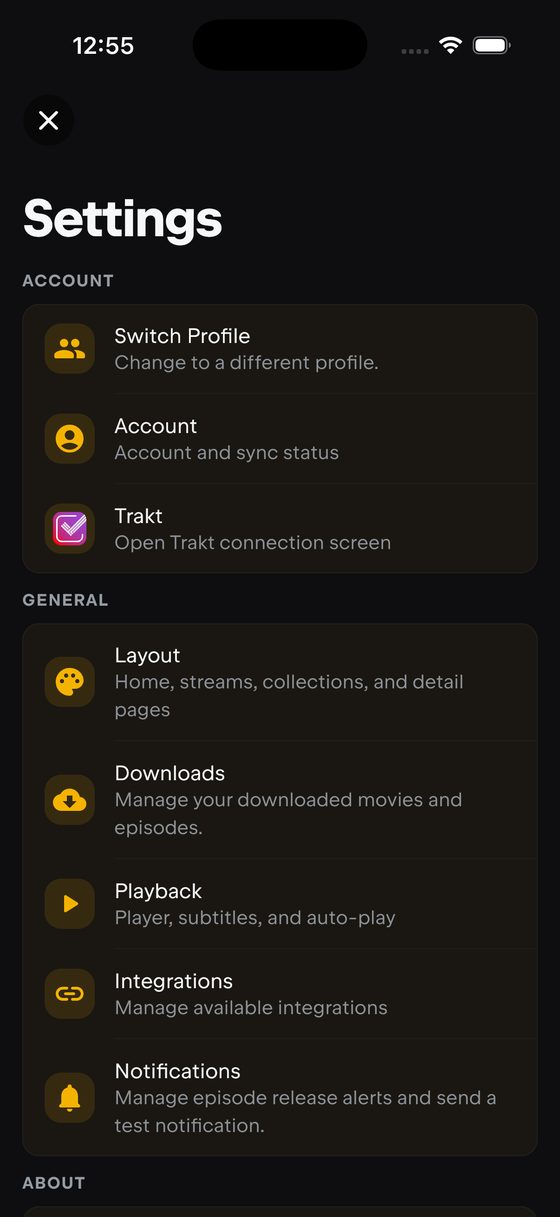
- 1Tap the profile avatar in the top-right of any tab to open Settings. The ✕ at the top-left closes it — there is no back arrow.
- ACCOUNT → Switch Profile — Change to a different profile.
- Account — Account and sync status.
- Trakt — Open Trakt connection screen.
- 2Integrations sits in the GENERAL section.
- GENERAL also holds Layout, Downloads, Playback and Notifications. There is no IPTV row here in this build.
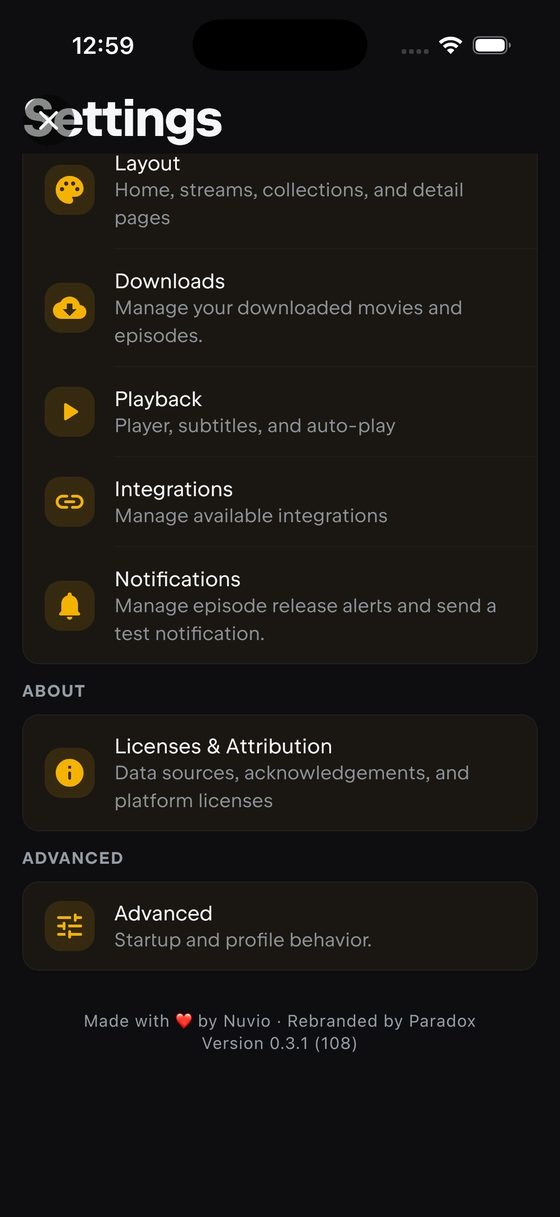
- ABOUT → Licenses & Attribution — Data sources, acknowledgements, and platform licenses.
- ADVANCED → Advanced — Startup and profile behavior.
- 1The footer carries the version — quote it when you report a bug.
8. Signing out, and signing in later
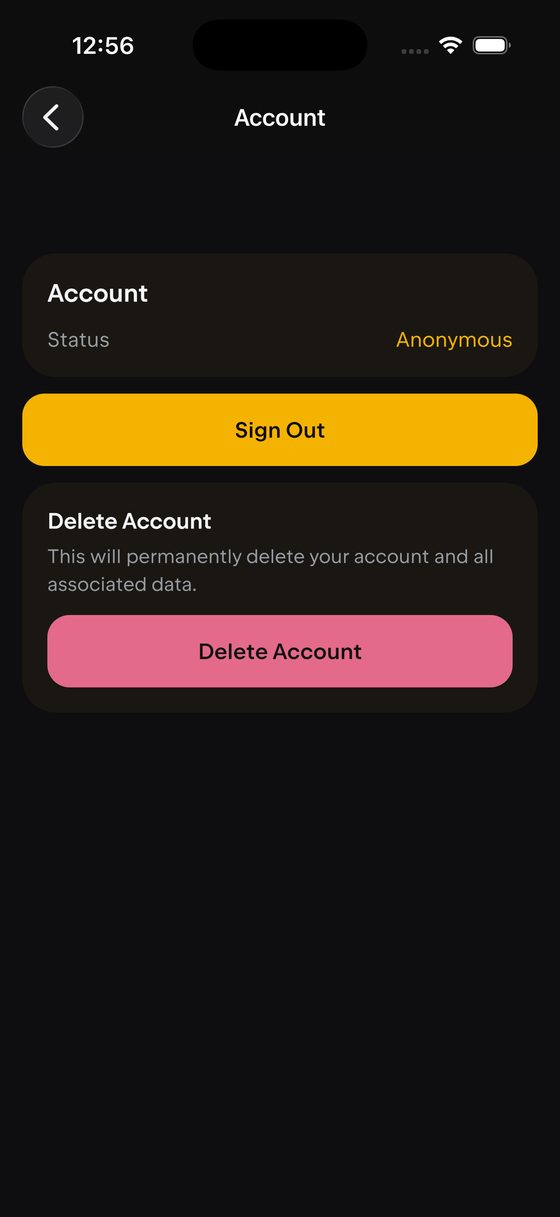
- Account → Status reads Anonymous.
- 1The yellow Sign Out drops the local session.
- Delete Account — This will permanently delete your account and all associated data.
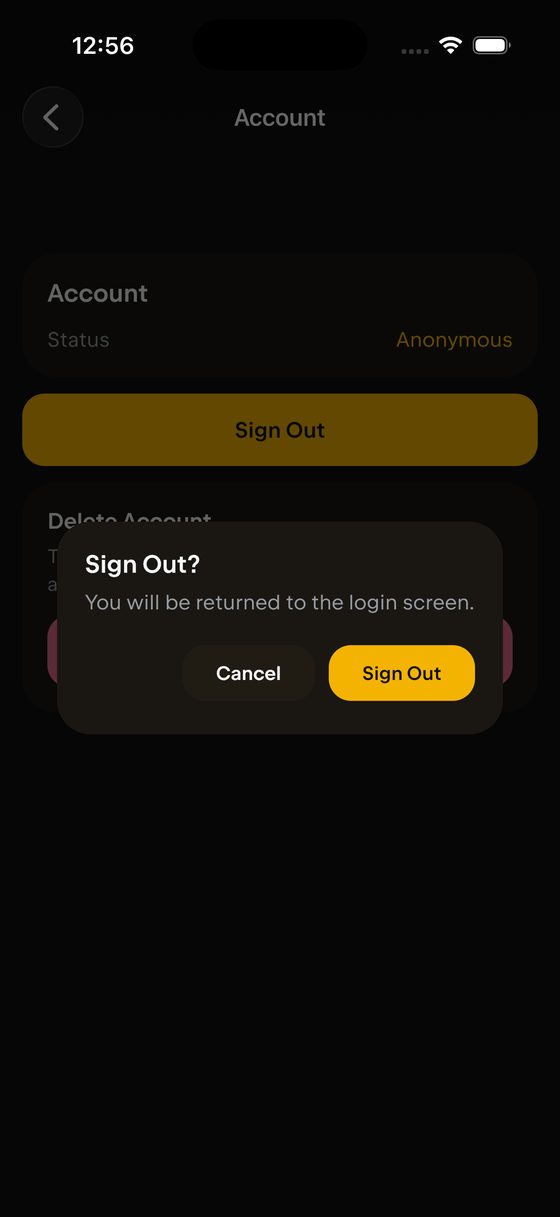
- Sign Out? / You will be returned to the login screen.
- Cancel backs out.
- 1Sign Out confirms.
Signing out wipes the local profiles. After a sign-out the picker was back to nothing but Add Profile — the profile made earlier was gone. Sign out only when you mean it.
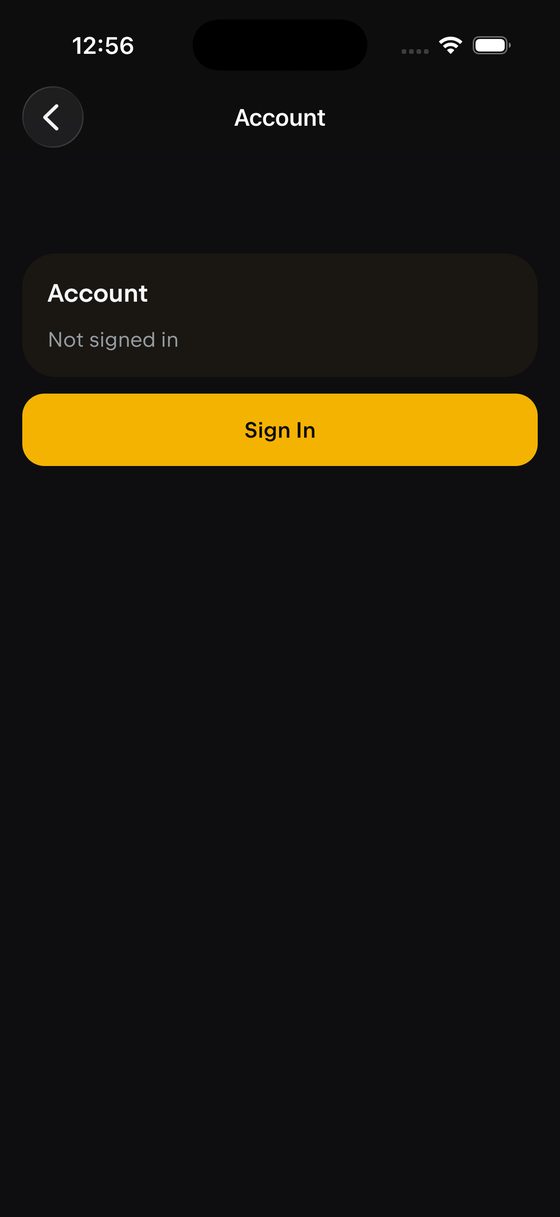
- The card reads Account / Not signed in.
- 1The yellow Sign In button here does nothing useful in this build — it does not open the login screen while the Settings sheet is up.
- Close Settings with ✕, force-quit Tuvora and open it again. The Welcome Back screen appears at launch whenever there is no session.
What is different from Android
- Settings is the avatar in the corner, not a tab — iOS only fits five tabs.
- The Settings sheet closes with ✕, not a back arrow.
- DNS Provider does nothing here. The app says Android only — iOS ignores this setting.
- Signing in from Settings does not work — relaunch the app instead.
Playlist type-specific detail lives in the M3U, Xtream Codes and Stalker guides, including troubleshooting.
Your playlist URL usually carries your username and password. Never post it publicly — blur it or replace it with http://REDACTED:8080/… in screenshots and bug reports.
Screenshots taken on Tuvora 0.3.1 (108), iPhone running iOS 26.5, fresh install with no provider added.