Set up Tuvora on Android TV and Fire TV
Install, sign in without typing, and add your playlist. One warning up front: the Add IPTV provider button on the IPTV tab does not open the add form — the path that works is Settings → Integrations → IPTV (Xtream Codes) → Add IPTV account.
1. Install
On a Fire TV or a stick, use the Downloader app and type the number — no letters to hunt for on a remote. Each code always fetches the current release.
- Open Downloader, type 5040595 and let it fetch the TV build. Install when Android asks.
- Prefer the store? Tuvora is on Google Play open testing — join the tester group, then open the Android TV listing.
- The phone app is a separate download — code 3250150, or tuvora.co/apk. Worth having: you can type your playlist on the phone instead of on the TV.
2. First run — pick Advanced
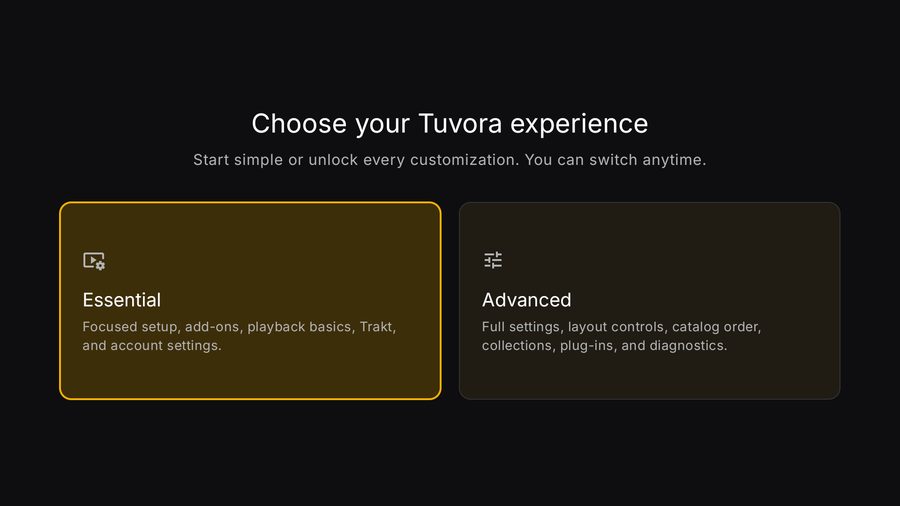
- The screen reads Choose your Tuvora experience / Start simple or unlock every customization. You can switch anytime.
- Essential is focused by default — Focused setup, add-ons, playback basics, Trakt, and account settings.
- 1Press RIGHT to focus Advanced — Full settings, layout controls, catalog order, collections, plug-ins, and diagnostics.
- Press OK to confirm.
Choose Advanced. The rest of this guide walks through Settings → Integrations → IPTV (Xtream Codes), and that is where it was captured. You can switch modes later.
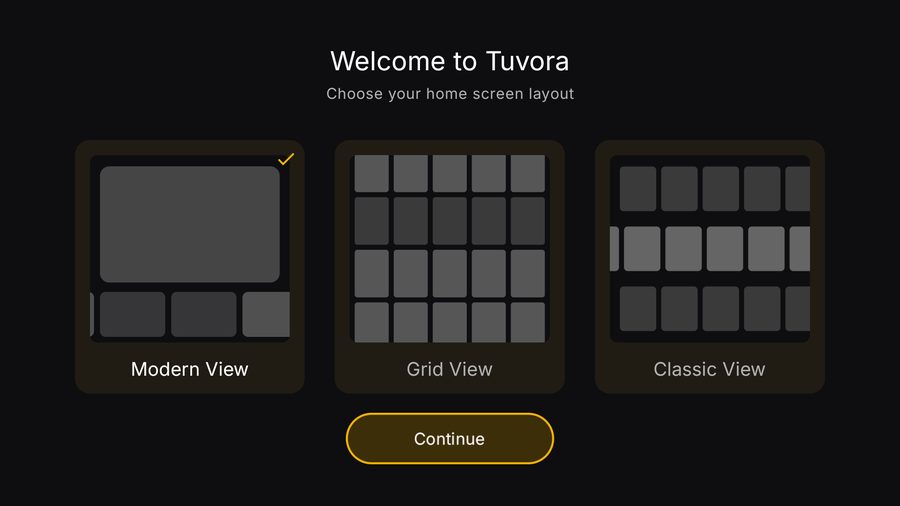
- The screen reads Welcome to Tuvora / Choose your home screen layout.
- Modern View — the default.
- Grid View
- Classic View
- 1Focus lands on Continue. Press OK to reach Home.
3. The sidebar
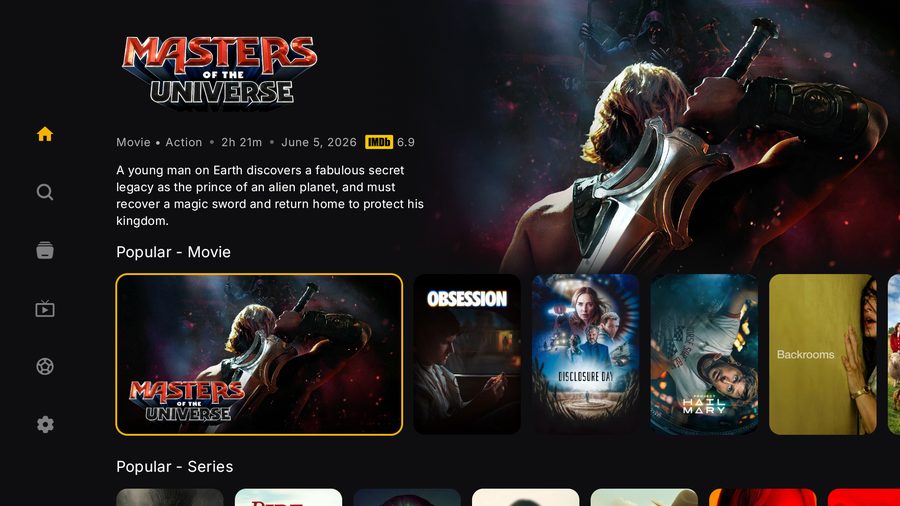
- The sidebar stays icon-only until you focus it. Top to bottom: Home, Search, Library, IPTV, Sports, Settings.
- The Home icon.
- 1The Settings gear, at the bottom.
- Press LEFT from any content card to expand it.
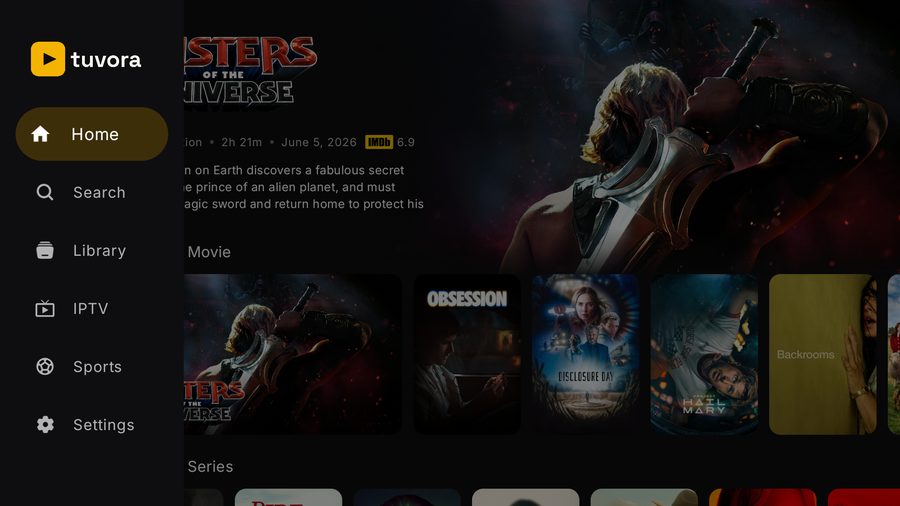
- Home — focused here, shown as a marigold pill.
- Search
- Library
- IPTV — the label is IPTV, not Live TV.
- Sports
- Settings
4. Sign in with a QR code
The TV never asks you to type an email and password. It shows a code, you approve it on your phone, and the TV signs itself in. An account syncs playlists, profiles and watch progress between your devices.
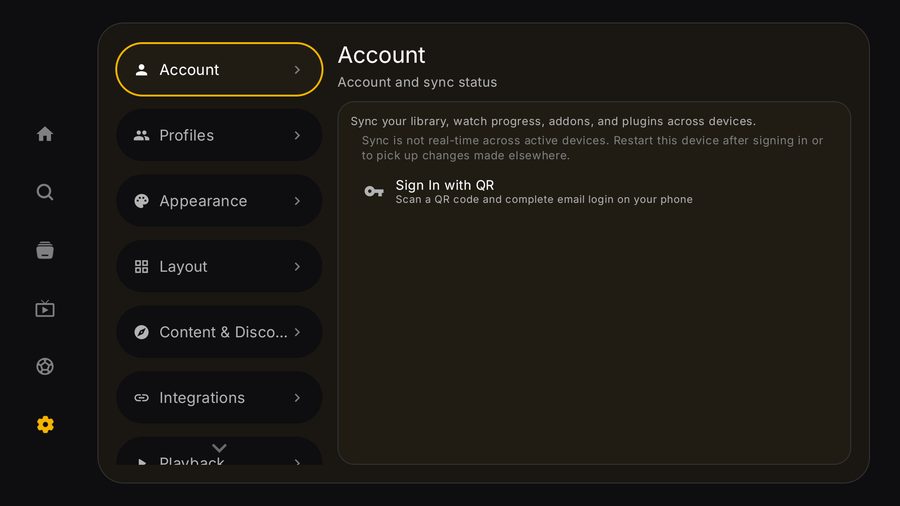
- From Home press LEFT, then DOWN five times to reach Settings, then OK.
- Settings opens with Account selected in the left nav. The sections run Account, Profiles, Appearance, Layout, Content & Discovery, Integrations, Playback, Trakt, About, Advanced, Debug.
- 1Press RIGHT to move into the panel and focus Sign In with QR — Scan a QR code and complete email login on your phone. Press OK.
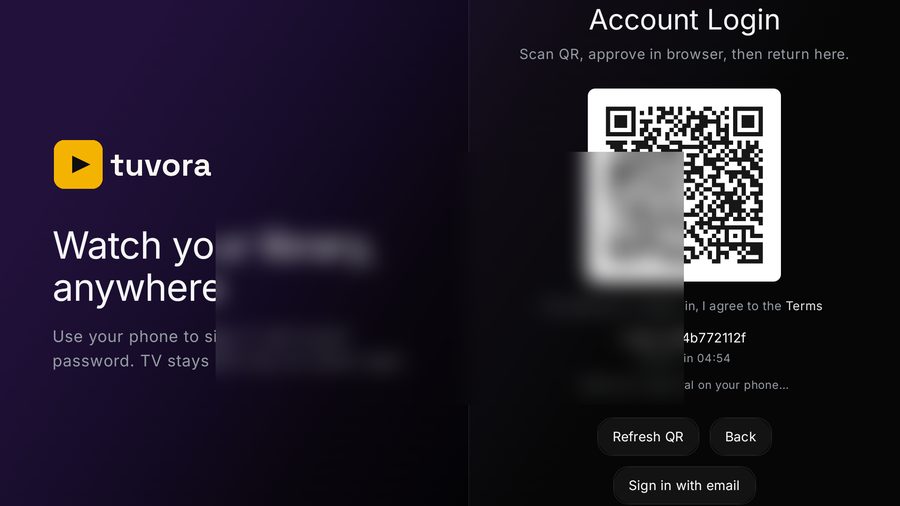
- The heading is Account Login / Scan QR, approve in browser, then return here.
- 1Scan the QR code with your phone camera and finish the login in the browser it opens.
- Under it sits Code: with a six-character code, and Expires in — you get five minutes.
- The status line reads Waiting for approval on your phone… until you approve it.
- Refresh QR generates a new code if yours has expired.
- Back returns to Settings.
- Sign in with email is there if you would rather type on the TV.
Sync is not live. The Account panel says so itself: Sync is not real-time across active devices. Restart this device after signing in or to pick up changes made elsewhere. If something you added on your phone is missing, restart the TV app before assuming it failed.
5. The IPTV tab, and why it does not lead where you expect
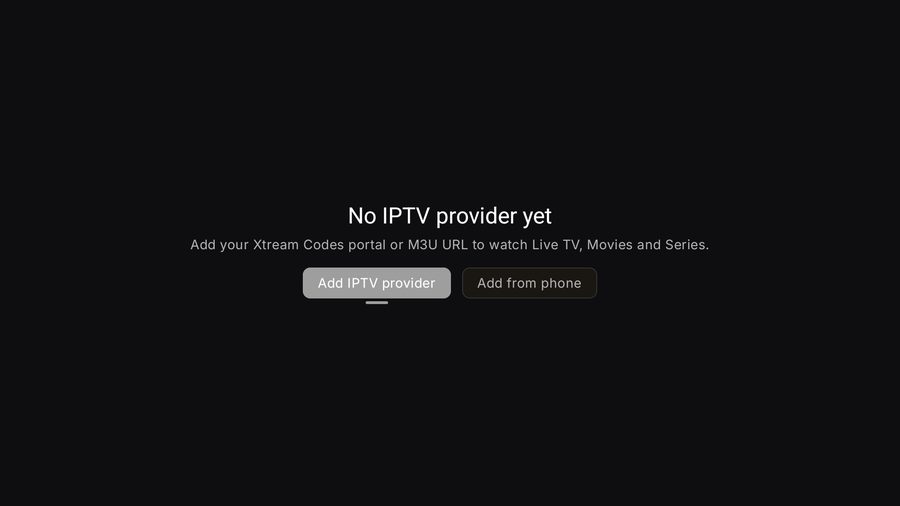
- From Home press LEFT, then DOWN three times to IPTV, then OK.
- The empty state reads No IPTV provider yet / Add your Xtream Codes portal or M3U URL to watch Live TV, Movies and Series.
- 1Add IPTV provider is focused — but it does not open the add form. See the warning below.
- Add from phone pairs with your phone instead; it is covered further down.
Add IPTV provider on this screen jumps to the root of Settings, on Account, not to the Add Playlist dialog. You still have to walk to the IPTV section yourself. The path that works is Settings → Integrations → IPTV (Xtream Codes) → Add IPTV account.
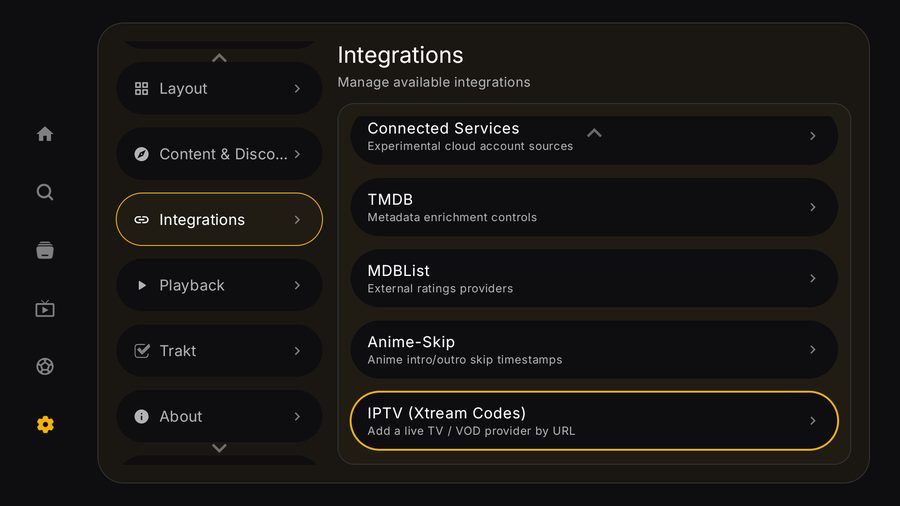
- 1In Settings, focus Integrations in the left nav — from Account that is DOWN five times — and press OK.
- Focus moves into the panel. The rows are Connected Services, TMDB, MDBList, Anime-Skip, IPTV (Xtream Codes).
- 2Press DOWN four times to reach IPTV (Xtream Codes) — Add a live TV / VOD provider by URL — and press OK.
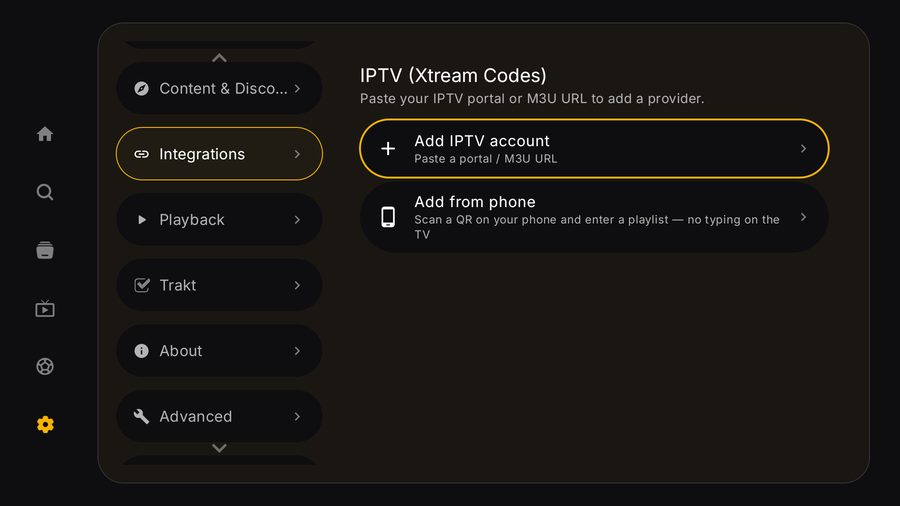
- The header reads IPTV (Xtream Codes) / Paste your IPTV portal or M3U URL to add a provider.
- 1Add IPTV account is focused — Paste a portal / M3U URL. Press OK to open the Add Playlist dialog.
- Add from phone — Scan a QR on your phone and enter a playlist — no typing on the TV.
6. The Add Playlist dialog
The dialog opens with the on-screen keyboard already up and focus already in the first field. If typing a long portal URL with a remote does not appeal, close the dialog and use Add from phone instead — it is the last section on this page.
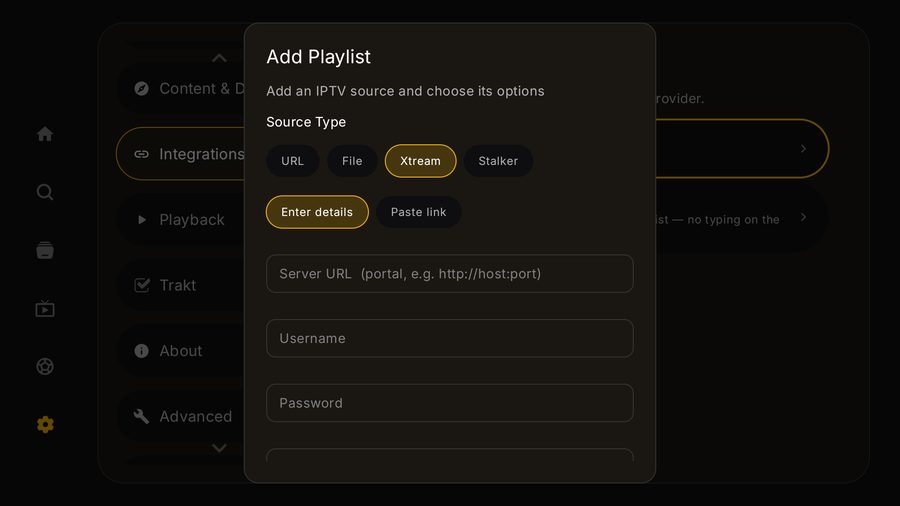
- The dialog is titled Add Playlist — Add an IPTV source and choose its options.
- The Source Type row.
- URL — a hosted M3U link.
- File
- 1Xtream — selected by default.
- Stalker. All four are selectable in this build.
- With Xtream selected there is a second row: Enter details, the default.
- …and Paste link, if you have a single get.php URL.
- 2Server URL — portal, e.g. http://host:port.
- Username
- Password. Name (optional) follows below the fold, then EPG URL (optional), DNS Provider, Auto-Refresh and the Add Playlist button.
A chip filled solid marigold is selected; a chip with a marigold outline is only focused. Press OK on a focused chip to actually select it.
BACK is overloaded in this dialog. The first press closes the on-screen keyboard; the second closes the whole dialog and throws away what you typed. A third press leaves the IPTV section entirely.
6a. Xtream — paste link instead
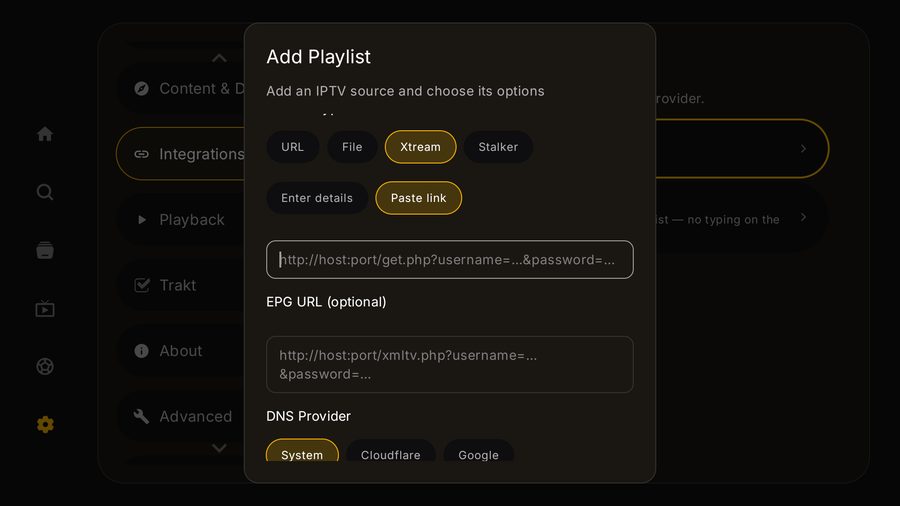
- 1With Xtream selected, focus Paste link and press OK.
- The three credential fields collapse into one, with the placeholder
http://host:port/get.php?username=…&password=…. - EPG URL (optional) takes the matching
http://host:port/xmltv.php?username=…&password=…. - The DNS Provider chips start below — System, Cloudflare, Google, Mullvad, Swiss, DNS.SB. System is the default.
6b. Stalker portal
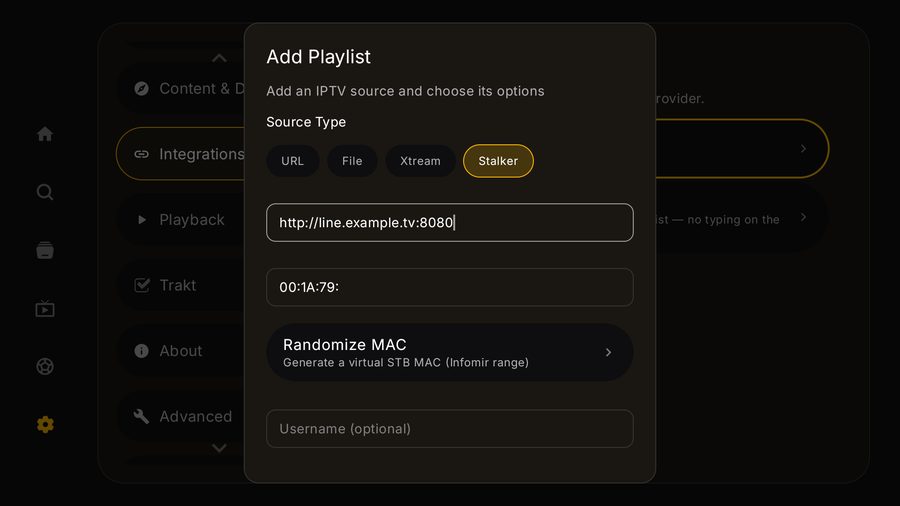
- 1Move focus to the Stalker tile and press OK.
- The form swaps to Portal URL — http://host:port.
- 2MAC Address — 00:1A:79:xx:xx:xx — arrives pre-filled with
00:1A:79:, the Infomir range. Type only the last three octets. - Randomize MAC — Generate a virtual STB MAC (Infomir range). It is an action, not a toggle: each press writes a fresh MAC into the field above.
- Username (optional) — most portals do not want one.
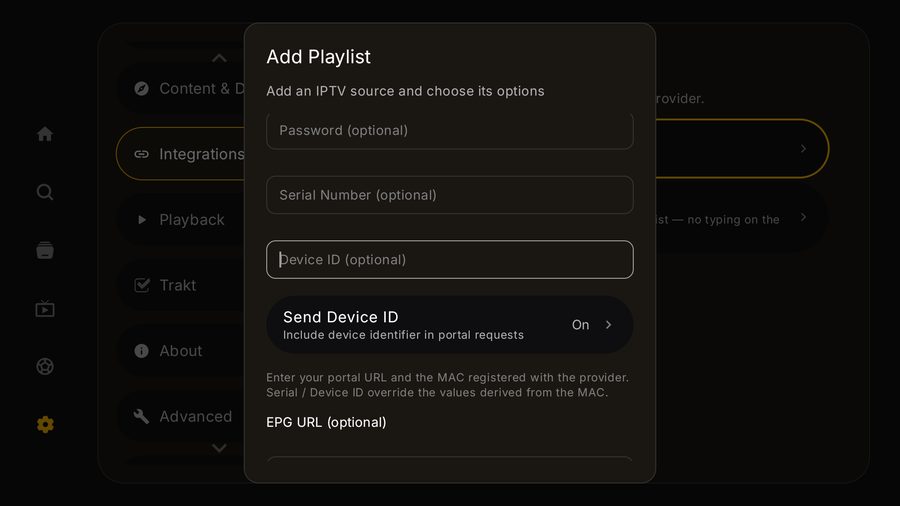
- Password (optional)
- Serial Number (optional)
- Device ID (optional)
- Send Device ID — Include device identifier in portal requests. A toggle showing On or Off; it is On by default.
- The helper text: Enter your portal URL and the MAC registered with the provider. Serial / Device ID override the values derived from the MAC.
- EPG URL (optional) is shared by every source type.
Only set Serial Number or Device ID if your provider handed you specific values. Left empty, both are derived from the MAC.
7. Type it on your phone instead
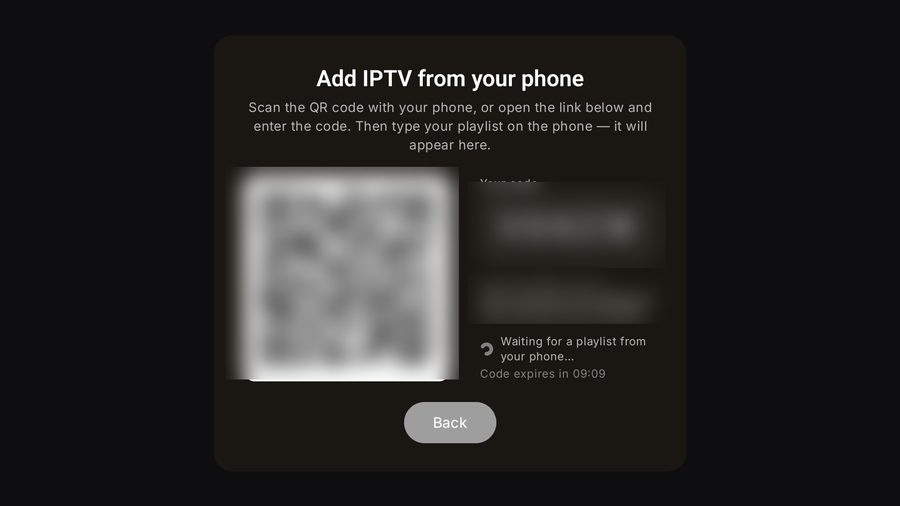
- From the IPTV section, move down to Add from phone and press OK.
- The heading reads Add IPTV from your phone — Scan the QR code with your phone, or open the link below and enter the code. Then type your playlist on the phone — it will appear here.
- 1Scan the QR code with your phone camera. This is the easiest route.
- The Your code box holds a six-character code.
- 2Or read the code off the On your phone, go to: line and open that address on your phone.
- The TV then shows Waiting for a playlist from your phone… and Code expires in — you get ten minutes.
- Back cancels.
Read the code from the On your phone, go to: link line, not from the Your code box. In this build the box can clip the last character, so a code typed off it will be rejected. The link line spells the code out in full, and scanning the QR avoids the problem entirely.
8. Afterwards
- Your provider appears under IPTV in the sidebar, split into Live TV, Movies and Series.
- To edit or remove it, go back to Settings → Integrations → IPTV (Xtream Codes).
- Added something on your phone and it is not here? Restart the TV app — sync is not real-time.
Playlist type-specific detail lives in the M3U, Xtream Codes and Stalker guides, including troubleshooting.
Your playlist URL usually carries your username and password, and both QR screens show a live, time-limited code. Blur all of it before posting a photo of your TV — and never include the URL in a bug report.
Screenshots taken on Tuvora TV 0.7.19-beta at 1920×1080, fresh install with no provider added.